The eHive Objects Image Grid plugin lets you display a grid of images from eHive on your website. Before you install this plugin you need to install the eHive Access plugin first.
 Step 1
Download the eHive WordPress plugins.
 Step 2
Log into your WordPress site.
 Step 3
Click the Plugins option on the left hand menu.
 Step 4
Click Add New at the top of the page.
 Step 5
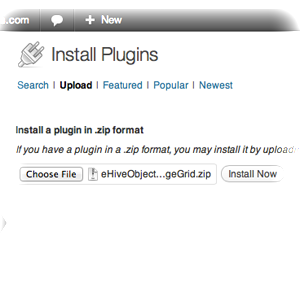
Click the Upload link just under the Install Plugins title.
 Step 6
Click the Choose File button and select a plugin to be installed. Select the eHiveImageGrid.zip file in the file browser.
 Step 7
Click Install Now. If everything went well you will see some installation progress text appear.
 Step 8
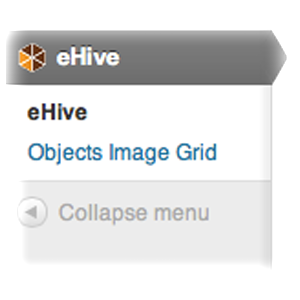
Click the Activate Plugin option which will direct you back to the Plugins page. You will now notice a new Objects Image Grid menu item appear when you click the eHive menu item at the bottom of your left-hand administration menu.
 Step 9
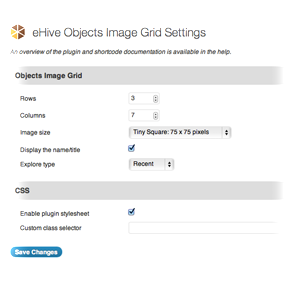
Click on the Objects Image Grid menu option to bring you to the plugin options page.
 Step 10
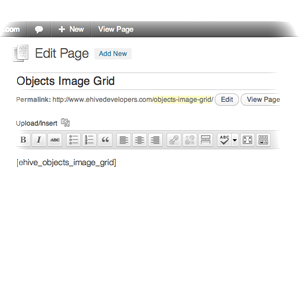
Edit or create a new page where you would like to display the Objects Image Grid. Once inside the page editor copy the following ‘short code’ into the editor
[ehive_objects_image_grid]
A ‘short code’ is WordPress’ way of telling a page to embed some content from a plugin.
After you have installed the plugin you can configure it using the plugin options page.
- Rows – The number of rows of images you would like to display in your grid.
- Columns – The number of columns of images you would like to display in your grid.
- Image size – There are a variety of image sizes and dimensions available for an image grid. You can select which size you would like to display in the image size drop down menu. The dimensions for each option are given in drop down the menu.
- Display the name/title – Adds the name/title field of the Object Record to the grid.
- Explore type– There are four explore types:
- All – This option allows you to enter a search term, sort and direction parameter to return a custom list Object Records from across all of eHive.
- Interesting – This is a predetermined set of interesting Object Records selected programatically by eHive.
- Popular – This is a predetermined set of the most popular (i.e. most visited) Object Records in eHive.
- Recent – This is a set of the most recently added Object Records in eHive.
- Search term – You can add a custom search term when you select the ‘All’ explore type option. This works the same way as a search on the eHive website.
- Sort by – You can select a field to sort your Object Records by when you select the ‘All’ explore type option. This works the same way as a sorted search on the eHive website.
- Sort direction – The sort direction allows you to select ascending or descending search results when you use the sort parameter. This works the same way as a sorted search on the eHive website. The sort direction parameter is only available when you select the ‘All’ explore type.
- CSS – You can choose to enable or disable the default packaged CSS. You can also add your own custom CSS class to the Objects Image Grid wrapper to add to the default CSS.